I started by filling the background with #e98dd3 then adding in this scanline pattern twice.
After adding in the scanline, lower the opacity and change the layer mode to either Soft Light or Overlay.

I also added a few effects to the background layer. Firstly, merge the layers together then go and apply Filter > Noise > Add Noise, then Filter > Render > Lighting Effects with the light type set as Omni.

2. Now you need to write out your text. First get the Horizontal Type Tool and write out your text in a dark purple color (#b5406f).

The font used in the above image is called VAGRounded BT, you can download it from here.
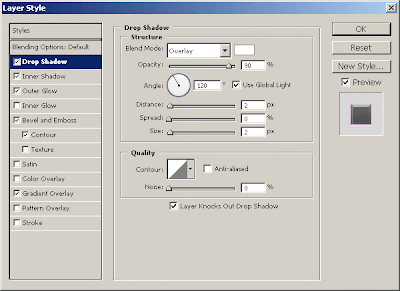
3. So, after you've written out your text, right-click the text layer in the layer's palette then go into the Blending Options, use the following options:
Drop Shadow. The color used for this Drop Shadow is #ffffff.
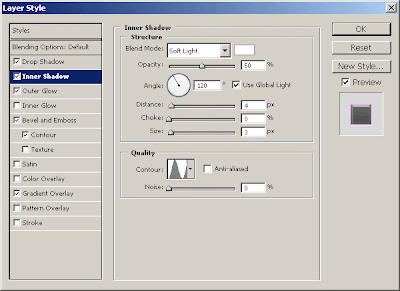
Inner Shadow. The color used for this Inner Shadow is #ffffff, also, pay attention to the Contour under Quality.
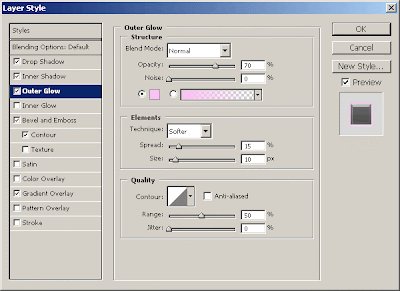
Outer Glow. The color used for this Outer Glow is #fac1f3.
Bevel and Emboss. Pay attention to these settings and you'll get the effect shown.
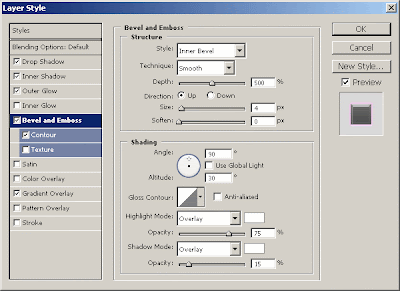
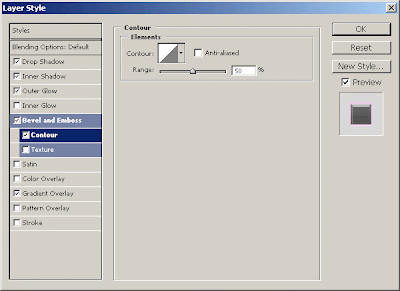
Bevel and Emboss - Contour. Default Contour settings.
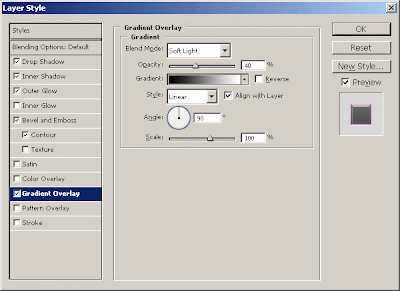
Gradient Overlay. Black to White gradient, Soft Light, 40%.
After applying all of those layer styles you should have text that looks like this:

4. Unless you want to apply some post-effects (like I did), you're finished with this tutorial!
To finish the image off, I merged all the layers together, applied Filter > Noise > Add Noise then Filter > Render > Lighting Effects.
